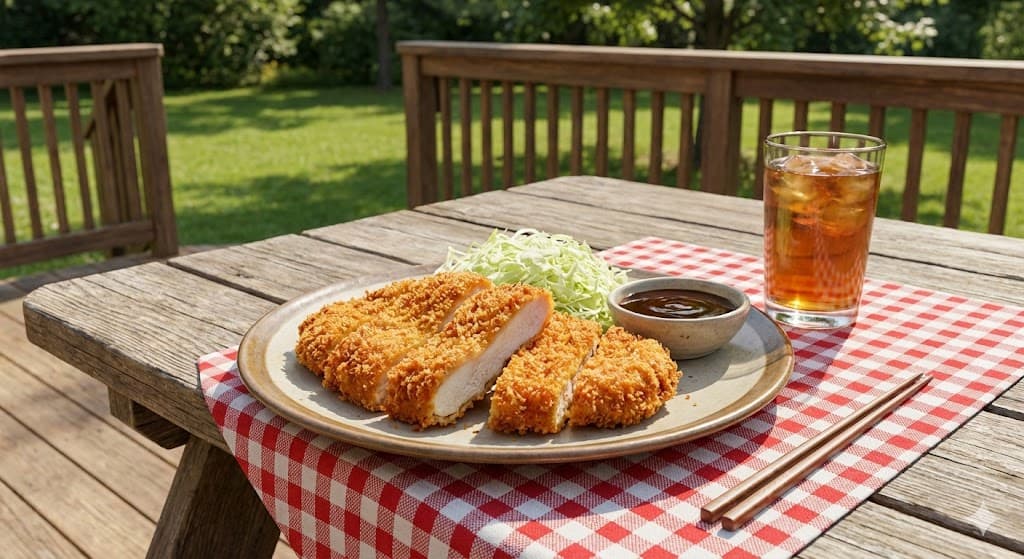
Air Fryer Chicken Katsu (Crispy Japanese Panko Cutlet)
Crispy, golden Japanese chicken katsu made easy in the air fryer. Shatteringly crunchy panko coating with juicy chicken inside—ready in just 25 minutes!


If you've ever ordered chicken katsu at a Japanese restaurant and wondered how they get that impossibly crispy coating, I have great news for you. Your air fryer can absolutely nail this dish at home, and it's so much easier than you'd think.
This air fryer chicken katsu recipe delivers that signature golden-brown panko crust with a juicy, tender chicken breast inside—all without the mess and calories of deep frying. It's one of my favorite simple air fryer meals because it looks impressive but takes less than 25 minutes from start to finish.
Whether you're new to air frying or just looking for the best air fryer recipes for beginners, this chicken katsu checks every box. Let's get that crispy, restaurant-worthy cutlet on your plate tonight!
Why This Recipe Works
- Panko breadcrumbs create an extra-light, shatteringly crispy coating that stays crunchy longer than regular breadcrumbs
- The air fryer circulates hot air around the cutlet, mimicking deep-frying results with 70% less oil
- Pounding the chicken thin ensures even cooking and maximum crispy surface area in every bite
- A quick egg wash with a touch of mayo helps the panko adhere better and adds richness
- Perfect for air fryer meal prep—make a batch on Sunday for easy weeknight dinners
Variations
Spicy Korean-Style Katsu
Add 1 tablespoon of gochugaru (Korean chili flakes) to the panko and serve with spicy mayo or gochujang sauce.
Parmesan Herb Katsu
Mix 1/4 cup grated Parmesan and 1 teaspoon Italian seasoning into the panko for an Italian twist. Serve with marinara.
Low-Calorie Air Fryer Katsu
Use chicken tenderloins instead of breasts and reduce panko to 1 cup. This creates perfect low calorie air fryer meals for weight loss at around 280 calories per serving.
Storage & Reheating
Storage: Store cooked chicken katsu in an airtight container in the refrigerator for up to 4 days. For best results, place a paper towel under and over the cutlets to absorb excess moisture. This is perfect for stackable air fryer meal prep ideas—layer between parchment paper in meal prep containers.
Reheating: Reheat in the air fryer at 375°F for 3-4 minutes until heated through and crispy. Avoid the microwave—it makes the coating soggy.
Ingredients
protein
- 2 lbs boneless skinless chicken breasts(pounded to 1/2-inch thickness)
pantry
- 1.5 cups panko breadcrumbs
- 0.5 cups all-purpose flour
- 1 tbsp mayonnaise
- 2 tbsp vegetable oil(for misting)
dairy
- 2 large eggs
spices
- 1 tsp garlic powder
- 0.5 tsp onion powder
- 0.5 tsp salt
- 0.25 tsp black pepper
Instructions
Place each chicken breast between two pieces of plastic wrap or in a zip-lock bag. Using a meat mallet or rolling pin, pound to an even 1/2-inch thickness. This is key for even cooking and maximum crispiness. Pat the chicken completely dry with paper towels.
Arrange three shallow dishes in a row. In the first, combine flour, garlic powder, onion powder, salt, and pepper. In the second, whisk together eggs and mayonnaise until smooth. In the third, spread out your panko breadcrumbs.
Working one piece at a time, dredge the chicken in the seasoned flour, shaking off excess. Dip into the egg mixture, letting excess drip off. Finally, press firmly into the panko, coating both sides completely. Use your hands to really press the panko into the chicken—this helps it stick during cooking.
Preheat your air fryer to 400°F (200°C) for 3-5 minutes. This step is crucial for achieving that instant sizzle when the chicken hits the basket, which creates a crispier crust.
Lightly spray or brush the air fryer basket with oil. Place the breaded chicken cutlets in a single layer, leaving at least 1 inch of space between each piece. Do not overlap or stack—work in batches if needed. Generously mist the tops with cooking spray.
Cook at 400°F for 5 minutes. Carefully flip the cutlets using tongs, then spray the other side with oil. Continue cooking for another 4-6 minutes until the internal temperature reaches 165°F and the coating is deep golden brown.
Transfer to a wire rack and let rest for 2 minutes—this keeps the bottom crispy instead of getting soggy on a plate. Slice against the grain into strips if desired, and serve immediately with tonkatsu sauce, Japanese curry, or over rice.
Tips for Success
- •Don't skip the mayo in the egg wash: It adds fat that helps the panko brown better and creates a more cohesive coating. This is a beginner air fryer tip that makes a huge difference!
- •Use an oil mister for even coverage: A fine mist of oil helps every panko crumb crisp up evenly. Aerosol cooking sprays work, but a refillable oil mister gives you more control and saves money.
- •Check internal temperature with a meat thermometer: Chicken should reach 165°F internally. The breading can look done while the inside is still raw, so always verify with a thermometer for food safety.
- •Let the breaded chicken rest before cooking: If you have time, let the breaded cutlets sit on a wire rack for 10 minutes before air frying. This helps the coating set and adhere better.
- •Work in batches for crispiest results: Overcrowding prevents proper air circulation. For air fryer recipes healthy easy results, single layers are non-negotiable.